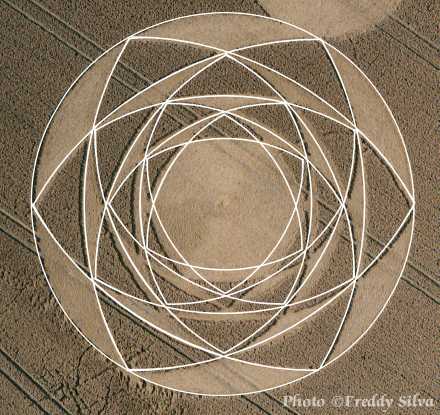
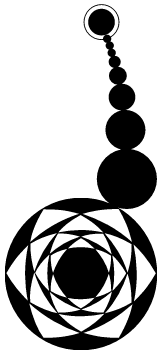
 | Although on first impressions this formation looks very complex on the ground, it's remarkably easy to construct with even a minimal knowledge of 2D geometry. I shall attempt to describe one way of constructing this formation from a basic design aspect. There may be other ways of constructing it, but I was trying to imagine how I would physically construct this shape on the ground. All you would need to calculate in the advance is the actual diameter of the main circle. From this you can construct the entire formation using pre-calculated lengths. Step 1.
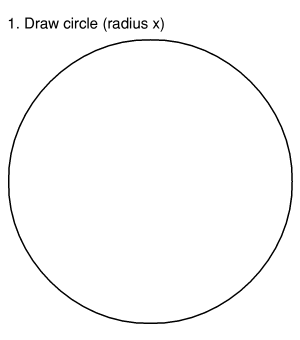
Firstly, work out how large you want it to be, and construct a circle. This will have radius x. |
 | Step 2.
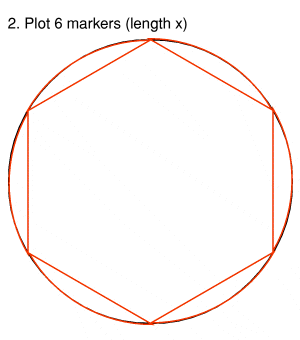
Using the same radius of the circle x you can mark six points on the circumference, forming a regular hexagon with sides of length x. N.B. You don't actually make the straight paths, but merely mark the six points on the circumference. If you were hoaxing this formation, one person would hold the rope/cord whilst a second person would walk around the perimeter of the circle (constructed in step 1) until the cord was tight across the top of the crop. This could even be pre-calculated in advance, to avoid carrying out measurements in the dark. |
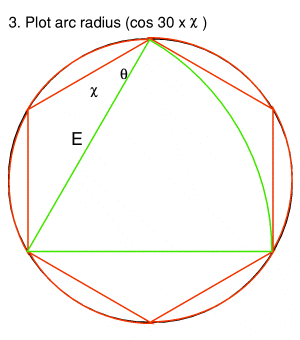 | Step 3.
In order to carry out step 3 you will need a measurement (or piece of cord) of the length between a point and it's neighbour-by-two (shown by line E in diagram 3).
Now, mark an arc joining every other point (shown in green).
You can calculate the length of line E in advance by using an elementary knowledge of trigonometry. 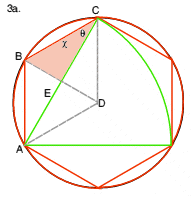 Pre-calculating length E Pre-calculating length E
This formation is based upon a regular hexagon, which effectively contains six equilateral triangles arranged around the centre of the formation (one is shown by lines B-C-D in diagram 3a). The line dissecting line E will form two right-angled triangles (one shown shaded) which allow us to calculate the length of one half of line E.
Because all angles in a right-angled triangle add up to 180°, the angle DBC must be 60° meaning that the angle of ABC is 120° (this is known anyway by virtue of all angles in a regular hexagon being 120°), thus angle BCE is 30°. As we know the length of BC (used in step 2) we can calculate length of line E as being 2x(COS 30°x length BC) simply by using the COS A = Adjacent/Hypotenuse rule.
|
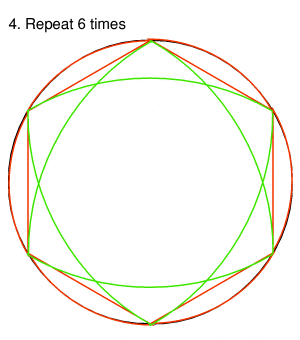 | Step 4.
Now repeat step 3 a further 5 times starting at each of the remaining points marked out in step 2 |
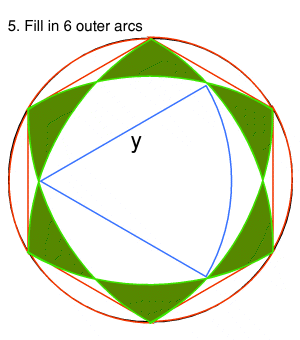 | Step 5.
The outer six segments are thus created by 'filling in' (flattening) the areas enclosed by the arcs created in setp 4. You can now create a new length Y by the same method used in step 3 - ie. the distance between two neighbour-by-two points, but this time using the new 'inner' points created by the completion of the previous steps. |
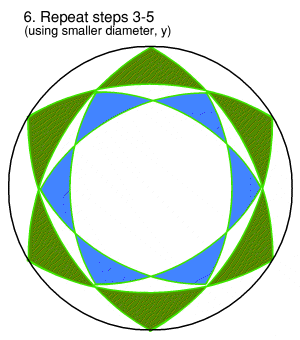 | Step 6.
Repeat step 4, which will create another six segments, within the circumference of the original pattern. You can now see the overall design beginning to take form. |
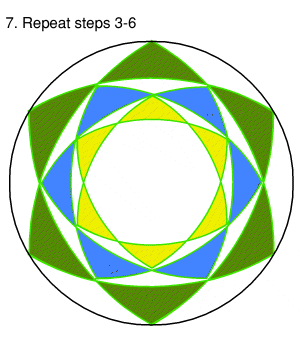 | Step 7.
Repeat steps 4-6 a third time, using the points just created by the completion of step 6. This will create the third iteration of segments. |
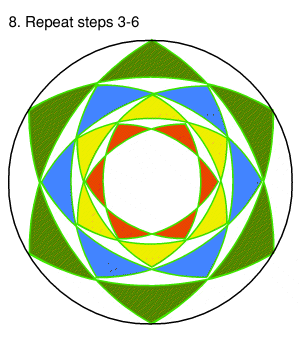 | Step 8.
And repeat steps 4-6 a fourth and final time. This will complete the design of the 'intricate' patterning of the major circle.
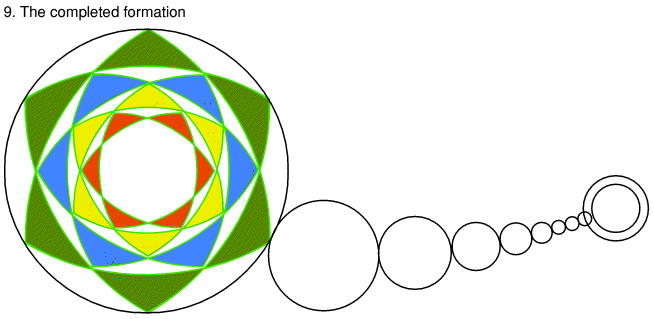
The rest of the neighbouring circles can now be added to the design (shown below in diagram 9). |
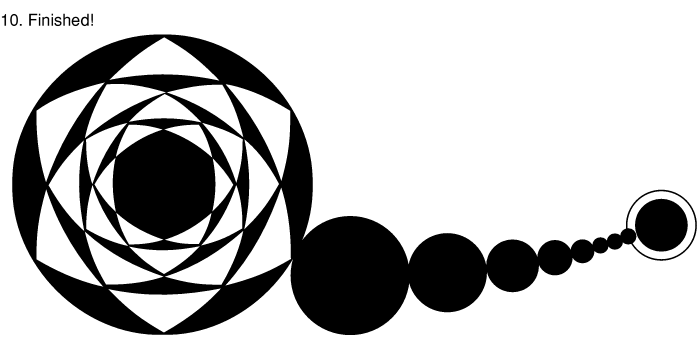
 Substituting the colours above for a simple black and white design we can view the overall formation, as seen on the ground. Black indicates flattened crop. |
 |
 A photo showing the actual formation can be seen on the right. This is taken from Lucy Pringle's excellent gallery of aerial photos, available online at www.lucypringle.co.uk/ | 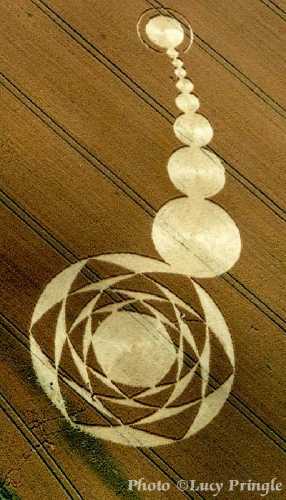 |